Contents
In this guide we will tell you all possible solutions to fix the Failed to obtain IP address error on your Android phone or tablet. By the way, quite often you can face another similar problem – stuck Obtaining IP address message under your Wi-Fi network name.
How to Fix Failed to Obtain IP Address on Android
Here we will post steps on how to get rid of stuck Obtaining IP address… or annoying Failed to obtain IP Address on your Android phone or tablet.
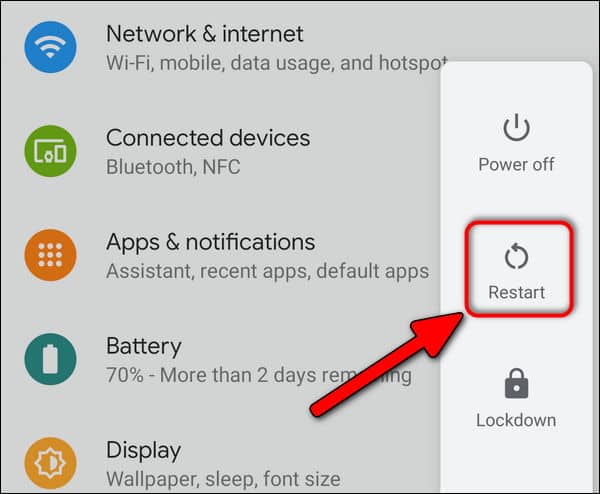
Step 1. Restart Your Android Device
Long-press the power key on your Android phone or tablet, select Restart (and confirm action if prompted).
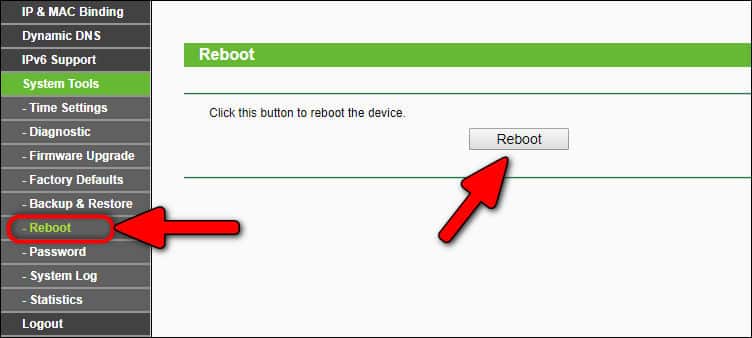
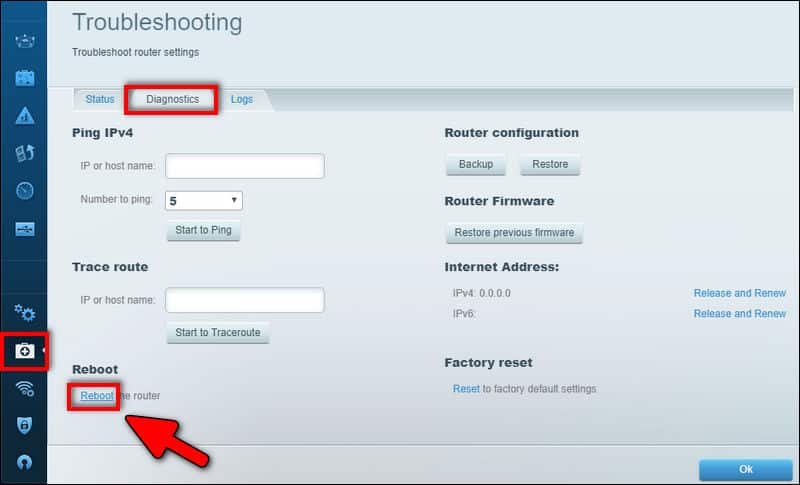
Step 2. Reboot Your Router
This is the first thing you should do. Even if this won’t fix the problem, it will surely make a lot of things clear. There four methods to reboot your wireless router: physical power button on the unit, reboot button in the router settings, remote command and manual disconnecting the power supply from the outlet or from the router. Use any of these methods depending on which is more suitable for you at the moment.
On TP-Link go to System Tools > Reboot
On LinkSys routers you need to click Troubleshooting > Diagnostics > Reboot:
Wait for about 5 minutes for router to reboot, turn on its Wi-Fi AP and connect to your ISP. Then check whether the Failed to obtain IP Address error persists.
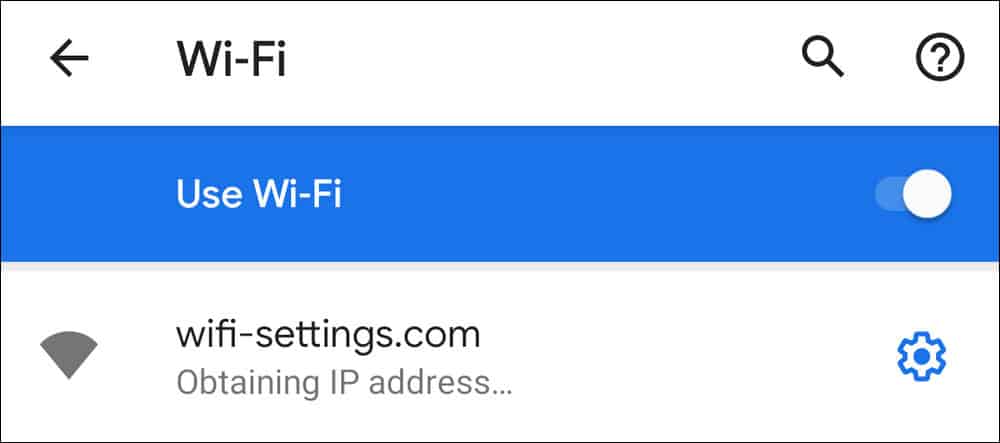
Step 3. Forget Your Wi-Fi Network and Reconnect to It Again
Go to Wi-Fi settings. Here forget the current Wi-Fi network:
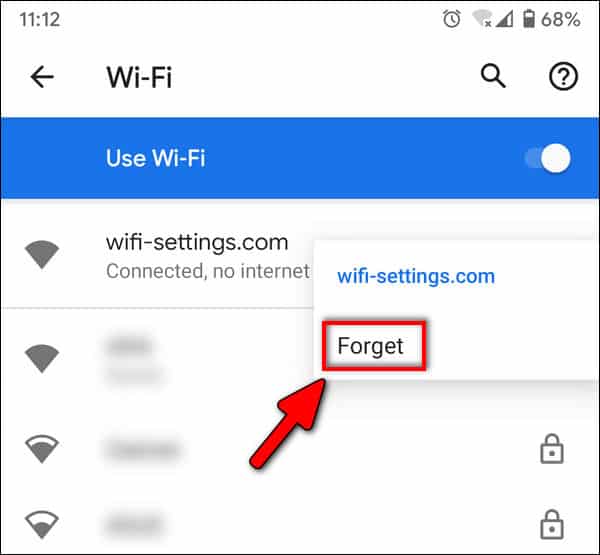
Then re-connect to it from a scratch – by entering the wireless security key (a.k.a. Wi-Fi password).
Step 4. Investigate the Signal Strength
Android device in hands approach the router and check whether you got the same error when you are near your wireless router. You should see a strong coverage being at the router. In spots, where you have a weak signal you will have endless loop of “Obtaining IP Address” because the transmitter power in your Android device won’t be enough to establish connection.
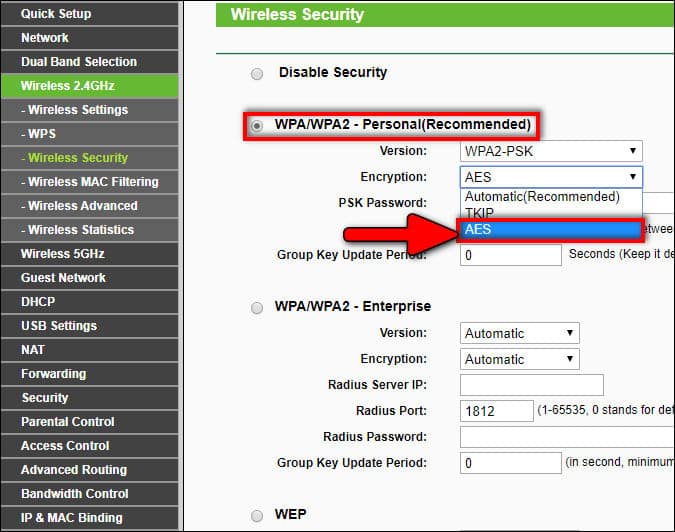
Step 5. Configuring WPA2-PSK with AES on Router
Log in to your router settings, head to the wireless security section and make sure you have selected WPA2-PSK as your security mode and AES as your encryption type.
If you have WPA/WPA2 and WPA2, select the WPA2 only option.
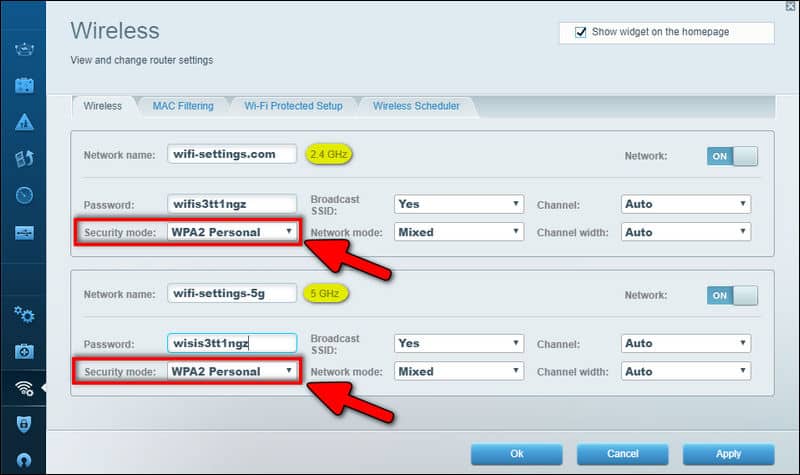
If you have TKIP or TKIP+AES that won’t do. You should switch to AES (on some routers and wireless access points it is called AES-CCMP), save settings of the router (AP), reboot it, than forget the Wi-Fi network on your Android device and reconnect from a scratch by typing your wireless security key.
Don’t forget to click on Save or Apply button on your router’s settings page!
On modern routers you may not find such choice. It means that everything is fine and your wireless router is using the correct cipher type – AES.
In addition, you should know that TKIP encryption is not supported in Wi-Fi networks using modern Wi-Fi standards 802.11n, ac and ax. So, there is absolutely no point in using it.
Step 6. Check if MAC Address Filtering is Disabled
This can be another reason why your Android phone failed to obtain IP address from your router.
Thus, you should either disable the feature in your router web interface or add the MAC Address of your Android to the allow list (a.k.a. white list). In both cases you need to save changes and reboot your router to achieve effect. Make sure you are adding the MAC Address of your wireless network adapter but not the MAC of your Ethernet or Bluetooth adapters by mistake.
Here is how to do this on TP-Link router. If you use denying method you need either disable the entry or remove it or turn off the filtering function completely. If you are using so called white list (allowing only listed devices to access your Network and Internet) you should add a client device’s MAC address to the list and Enabled the entry:
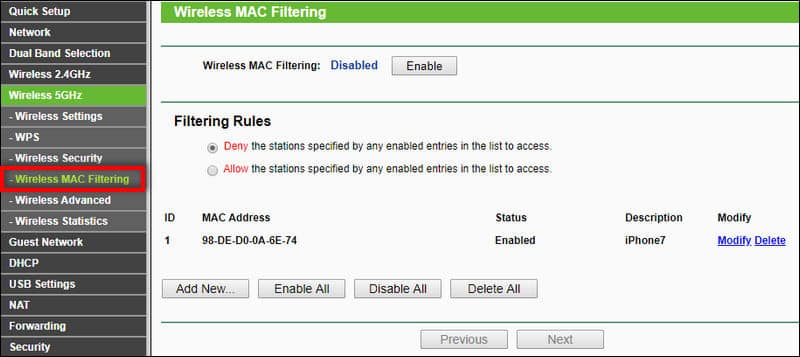
On my TP-Link Archer router I have to configure Wireless MAC Filtering for 2.4 GHz and 5 GHz Wi-Fi networks independently. So take it into account!
Depending on the model you may need to click Save, Apply or even restart your router or AP for changes to take effect. On some models it is not required.
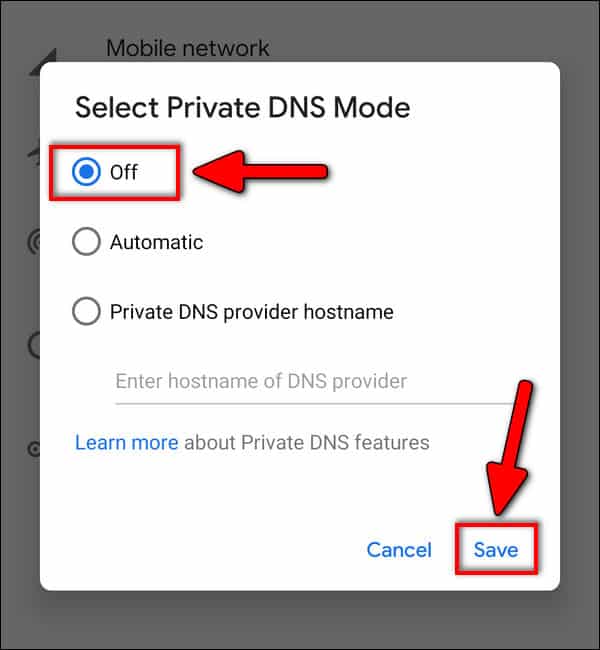
Step 7. Disable Private DNS on Android
Go to Settings > Wi-Fi & internet > Advanced > Private DNS > Switch to Off and tap Save.
Step 8. Move Your Router to Another Location
Wireless interference may be the reason of various errors and glitches. That’s why you should try moving your router to another location. Try to place your wireless router (or access point) physically in the middle between your computers and those places where you like to use phones and tablets so that there is a short distance to all client devices.
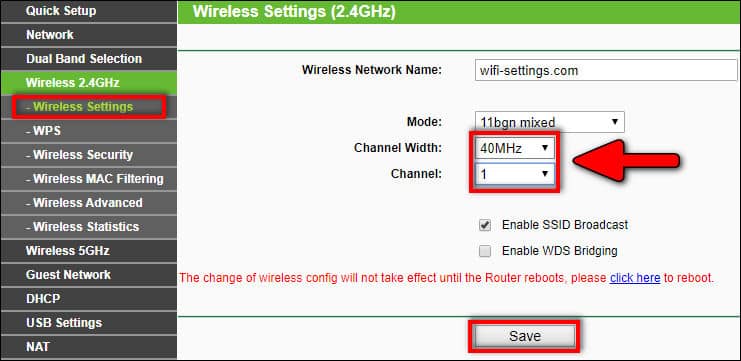
Step 9. Change Wireless Channel
If you still face the Failed to obtain IP address error, you’d better change the wireless channel because wireless interference can cause various issues with your Wi-Fi network.
Basically, you need to log in to your router settings again, select wireless section and switch the channel for your current Wi-Fi. Note that in most cases you will see the Auto option activated. If you see it active, this means that your router can change Wi-Fi channel at any time and who knows what quality that channel will demonstrate.
That’s why you need to select an even number from 1 to 11, save settings and reboot your router to apply changes. On top of this, you may experiment with channel width (if it goes about 2.4 GHz Wi-Fi) and try both options, 20 MHz and 40 MHz.
Once you’ve done this, you should wait for about a minute, than turn off the Wi-Fi on the device where you are experiencing persistent “Failed to obtain to IP address” error, turn it on again and check if something has changed.
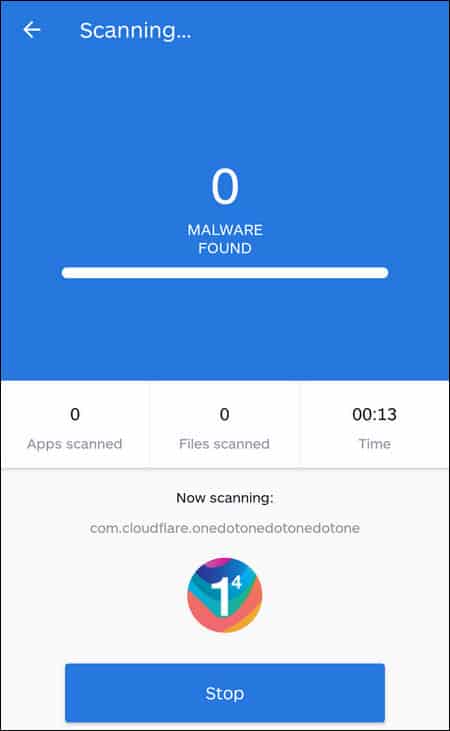
Step 10. Scan for Malware and Remove It
We can’t say that Android devices got infected with malware very often but you should still check it out.
If you have your cellular data connection working well, open the Google Play Store and install Malwarebytes app. Once it is installed, run it and check for malware. The app will prompt you to kill malware if any detected.
If you can’t install the app from the Google Play Store, you can download its apk-file from apkmirror.com.
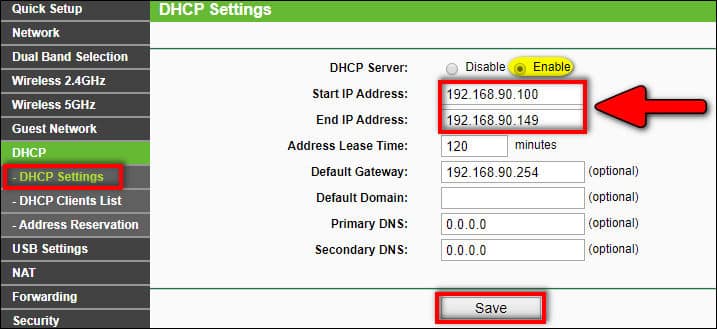
Step 11. Modify the DHCP Range
In some cases too small DHCP range can be the reason of the problem. Say, if you have your wireless router configured to work with 20 devices the IP-address range can be not enough to connect more clients. I faced such a case at a restaurant belonging to my friend. He provided a Wi-Fi password to every visitor and when there were a lot of clients some of them started getting the Failed to obtain IP Address error on their phones.
How to check and fix it:
- Log in to your router settings.
- Head to the DHCP section.
- You should be able to see Start IP Address and End IP Address fields. Modify the last octet at the End IP Address field to extend the IP address range.
For example if you have 192.168.0.100 as your start IP address and 192.168.0.149 as your end IP, change the last to 192.168.0.199: - Save changes and reboot your router.
12. Factory Reset the Router
As the last but not least option, try factory resetting your router. Ig you don’t know how exactly to perform the factory reset of your particular model, ask Google about “30-30-30 rule” to reset a Wi-Fi router.

The Popular Workaround: Assign a Static IP Address to your Android Device
If nothing of the above helps you get rid of Failed to obtain IP address error, we advise you to try the following workaround. Based on our experience, we can say that this workaround often helps to fix the Internet access on a problem device.
You need to switch from DHCP to Static option, manually fill in the IP address (it should be from the correct range and not be used by any other device) and correctly specify the Gateway (the local IP address of your Wi-Fi router). Then don’t forget to save settings. Here is an example:

Please, tell us in the comments whether these solutions helped you solve the problem or you still face “Failed to Obtain IP address” or stuck “Obtaining IP address” in a loop on your device.